
This is Part 3 of my ongoing efforts to create an underwater remotely operated vehicle.
If you haven’t already, check out Underwater ROV Project (Part 1) and Underwater ROV Project (Part 2).
Welcome to part 3 of the Underwater ROV Project. The saga continues! Like many journeys there are ups and downs, and things usually take longer than expected — but that’s ok.
So where are we, and how far have we come? Let’s take a look at where we left off from Part 2:

After Part 2, we had the chassis looking more complete (thrusters attached, a hole drilled for the CAT5 tether), and the electronics stack in a functional state where we could connect to the onboard computer (Raspberry Pi Zero) and run fully off of onboard power. It’s starting to look more like a sub!
ROV Progress
Chassis Work
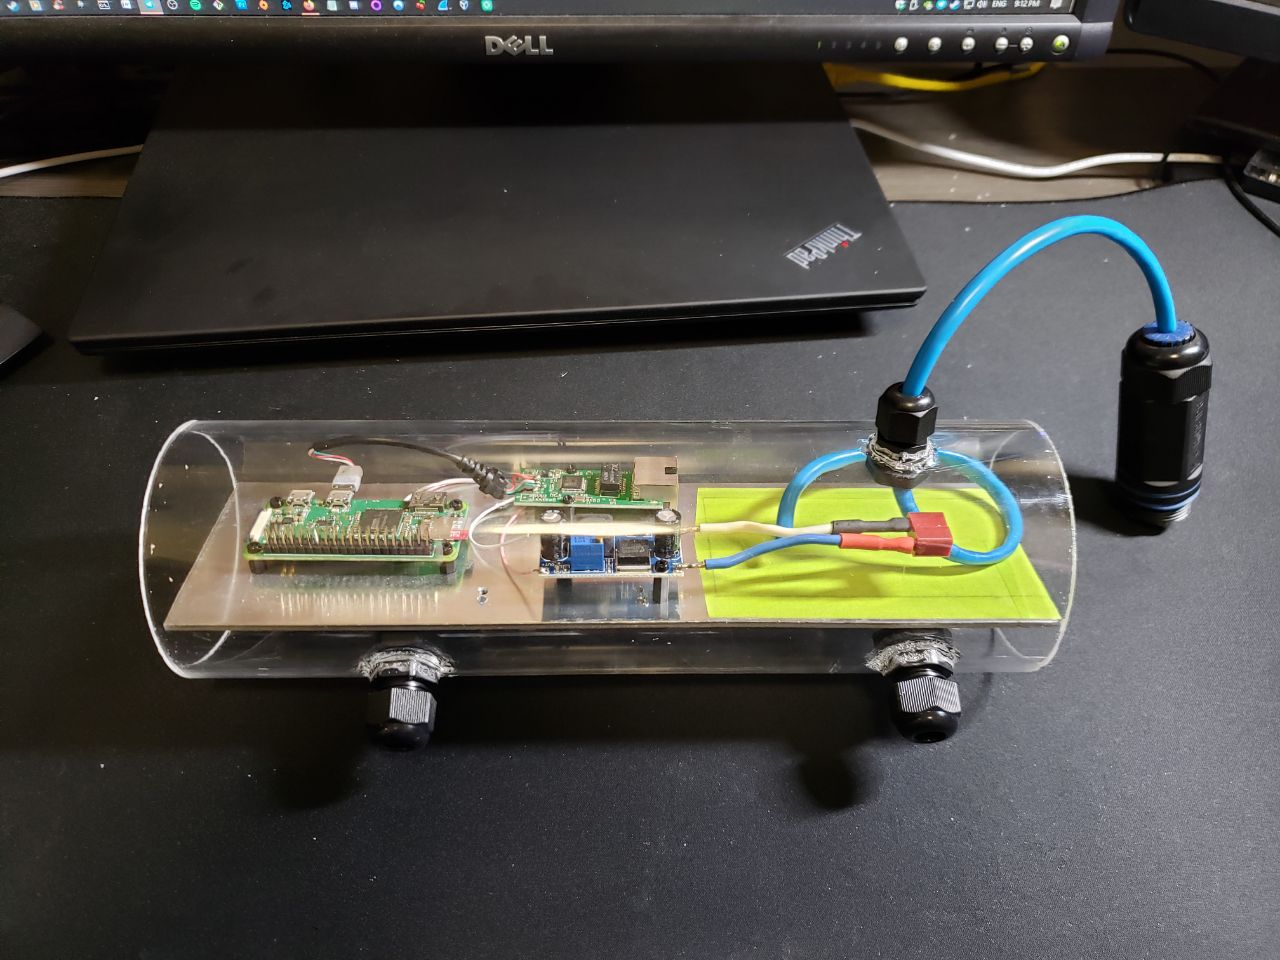
After long consideration, I realized that I would need proper bulkheads for the wet-to-dry transitions to make the chassis durable. You can’t have cables going from the water through the hull and into the dry chassis unless you KNOW things are water-tight. So I drilled holes for waterproof PG7 and PG9 bulkheads. This required a step drill bit and careful pressure to make sure I didn’t break the acrylic tube. I practiced on some scrap pieces I had lying around to help get the speed and pressure correct. Even with practice, I ended up drilling the holes too close together and ruined the entire dry chassis. I had to rebuild the entire chassis (acrylic tube, end seal, and dome) — taking into account the lessons learned, this didn’t take very long. I made 2 extras… just in case. The result was this:
With the bulkheads in place, I no longer needed runners to keep the electronics stack stabilized, and so I was able to remove them. This left a little more real estate for cables as the amount of cables getting stuffed into this chassis is significant.
I then ran the thruster data and power cables through each bulkhead and soldered a connector to their ends. Each thruster requires a motor controller (ESC), and it turned out that the ESCs that I bought were single-direction… so I had to buy new ones — bidirectional ones — because I want my thrusters to go forwards and backwards. I ordered 4 x 40A bidirectional ESCs from Amazon.
While I waited for the ESCs to arrive, I wrote the basic “base station” software for the sub that takes joystick input and translates it into commands for the ROV.
Once the ESCs arrived, I soldered connectors to them so that they were compatible to the thruster connectors — making sure that each terminal is in the proper place in each connector (i.e. Positive to Positive, etc.).

It was about at this point that I realized the complexity of my wiring, and so I started a wiring diagram for all the control pins from the RaspberryPi. Nothing fancy, but just enough to keep things straight. With each PIN having its own dedicated place, I was able to ensure my onboard software always knew where each thruster was, and where the light was (ah yes, I added a light — and needed a transistor to turn it on and off).

After a quick test to make sure things were soldered properly, I started connecting the dry and wet chassis together. Here is what it looked like (without the electronics stack, and hanging on my wall):

Now that the ROV chassis was near complete, it was time to focus more on the software (I had written tests throughout this process to ensure that the hardware would work, but now I was going to write the main software).
The only thing left to do was to ensure that the chassis was water-tight. This turned out to be an issue. My process was to remove all electronics and submerged the sub in water for 5 minutes, then inspect the ROV’s dry chassis for leaks. If there was a leak, dry it completely, re-seal the chassis and try again.
I repeated this process 5 times. There was always a leak. Lesson: In the future, I would try to use an injection mold or something that requires less sealing. I’m still working on sealing the chassis properly and to a rating that I would like. My goal is 30 feet below the surface.
The Software
The software consists of 2 parts: The onboard control software for the ROV, and the software that is on the laptop on shore (or base station). The laptop software needs to take joystick input, convert it to controls for the ROV, send it over the Ethernet tether, receive the continuous video stream, and display it to the operator (me). The onboard computer software needs to control the ‘startup sequence’ and arm the motor controllers, take commands via Ethernet (tether) and convert them to “commands” to the associated thrusters, or to switch the light on, etc. It also needs to stream the onboard camera feed back to the base station.
The Onboard Software
First. A challenge. The PiZero only has 2 Pulse Width Modulation (PWM) pins (required for sending voltages/commands to motor controllers) and I needed 4 — so I had to use the pigpio python library to get all 4 motors working without a “hat”. But work they did!
The control software was heavily based on the “instructables” article “Driving an ESC Brushless Motor Using Raspberry Pi” and a little of the “HowChoo” article “Controlling DC Motors Using Your Raspberry Pi“. For the LED control, I used this article: “Control LED Using GPIO Output Pin“.
I wrote all software in Python — which was unexpected. I was expecting to have to write SOME C or C++.
The end result is this:
Summary and Lessons Learned From Part 3
Lessons Learned:
- When drilling holes, check not just the hole width but the connector width too — make sure you have enough space
- Be weary of real estate… wiring starts to add up and space gets tight
- If you can afford it, get better brushless motors and ESCs (and make sure the ESCs are bidirectional!)
- ALWAYS check the soldered connections on your power cables (make sure they have a good connection)
- There are SOME hardware failings that can be fixed in software (i.e. I fixed a power differential by making a software power offset — one thruster gets 5% more power)
- Software takes a long time to get right — lots of “gremlins” in the hardware AND software.
The Status of the ROV:
- Full onboard software control of motors and lights (Technically the sub is “drivable” at this time)
- Basestation software contacts sub’s onboard software and sends commands
- All electronics and motors running off of battery power with no issues (so far)
- A TODO: NO camera capability yet (and camera needs to be mounted to electronics board)
- A TODO: Need to finish a successful “seal test” to make sure there are no leaks
- A CONCERN: Bouyancy — will I need to weigh it down? Strap weights to exterior? Will know after seal test.
- A CONCERN: Motors are VERY powerful. Even 10% power might be too much. Throttle with software.
I’m getting close. Stay tuned for Part 4.

You must be logged in to post a comment.